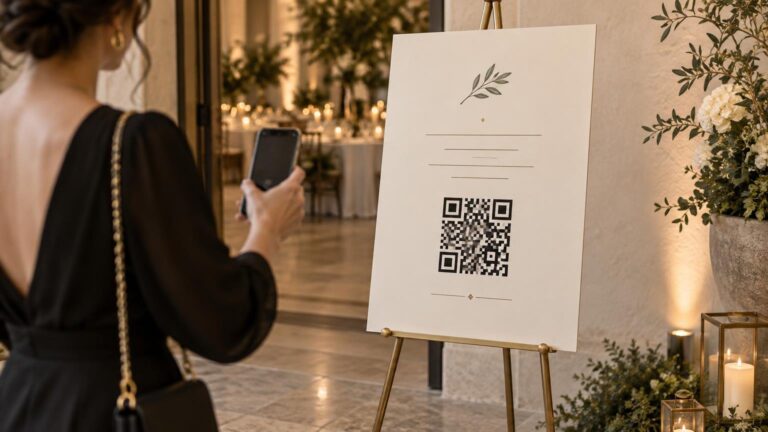
The right event sign mounting method is the one that keeps the message visible, the installation stable and the venue undamaged without obstructing guest movement. Easels offer flexibility, wall mounting saves floor space, window graphics use existing glass, and freestanding structures can carry larger or more permanent-looking displays. None is automatically best.
Choose the location before choosing the hardware. A beautiful welcome sign on the wrong stand can disappear behind a line of guests, tip when a door opens or consume space needed for circulation. Start with the venue’s rules, map the viewing angle and walking route, and then specify the panel, base, adhesive or hardware as one installed system.
TLDR: Match the mount to the room, not just the sign
- Choose an easel for portable, short-term signs when the venue permits a modest floor footprint and the location is protected from bumps or wind.
- Choose a wall mount when floor space is scarce and the venue has approved the exact hardware or adhesive for the exact surface.
- Choose a window mount when the glass is visible from the intended approach and the venue approves the film, installation side and removal plan.
- Choose a freestanding stand or structure for large, double-sided or strategically placed signage, provided its base, supports and weights remain outside circulation and door paths.
- Get written permission before making a test patch, using adhesive or installing hardware. Include setup and removal time in the production plan.
A quick comparison of mounting methods
| Method | Strongest use | Main advantage | Main constraint |
|---|---|---|---|
| Easel | Welcome signs, seating charts and room-entry signs | Portable and requires no surface attachment | Occupies floor space and can be bumped or tipped |
| Wall mounted | Menus, schedules, sponsor panels and directional signs | Preserves floor space and can sit near eye level | Requires permission and compatible attachment hardware |
| Window mounted | Entry graphics, hours, directional messages and decorative decals | Uses existing glass without adding a stand | Reflections, visibility direction and adhesive compatibility matter |
| Freestanding | Large wayfinding, branded panels and double-sided displays | Flexible placement and substantial visual presence | The complete base and support system affects clearance and transport |
Treat this as a starting point rather than a permission chart. Venue rules vary, and some facilities prohibit nails, tacks, staples or tape on walls, windows and floors. A facility may require signs to be freestanding or demand approval before anything is displayed on a building surface. Other facilities restrict where easels may stand.
Ask the venue before designing the installation
Request the venue’s current sign and decoration policy before sending the sign to print. Ask about walls, glass, doors, floors, railings and existing sign hardware separately. “Removable” does not mean “venue approved,” and verbal permission from one staff member may not help the setup crew understand what was authorized.
Send the venue a compact installation proposal showing the sign dimensions, installed height, total footprint, location, attachment product, setup time and removal method. For a freestanding display, include the base, rear supports, ballast and any projecting feet—not merely the printed face.
Confirm these points in writing:
- Whether the proposed location and mounting method are allowed
- Which surfaces may receive approved adhesives or hardware
- Whether a test patch is permitted and where it may be placed
- Whether the venue supplies easels, hooks, rails or sign holders
- Whether additional furniture or display structures require approval
- When installation may begin and when every component must be removed
- Who is responsible for cleaning, repair or damage
- Where empty cases, ladders and packing materials may be stored
Some venue policies require prompt removal after the reservation and make the event responsible for cleaning or damage associated with installation. They may also require signs to remain within the reserved area or teardown to finish within the booking window. Build those limits into the event print production timeline rather than treating installation as a final-hour detail.
When an easel is the best choice
An easel works well for a welcome sign, seating chart, portrait, schedule or directional panel that must move during the event. It avoids attaching anything to a finished surface and folds down for transport. It is especially useful when the venue changes room assignments or when one sign must serve the ceremony, cocktail hour and reception in sequence.
The tradeoff is stability. A narrow tripod easel supporting a tall panel may be vulnerable to contact, uneven flooring and air movement near doors. Check the manufacturer’s capacity for the actual panel, then test the assembled combination. A lightweight easel that holds a foam-board sample in a studio may behave differently with a larger panel, floral decoration or guest traffic around it.
Place the easel where guests can approach and read without gathering in the doorway. Keep its rear leg, front feet and any weights within a controlled footprint. If a venue allows an easel at a room entrance, that does not necessarily mean it allows one in a main corridor or lobby. Idaho State University, for example, permits informational easels at room entrances while prohibiting them in building lobbies and main hallways.
Use an easel when portability matters more than precise alignment. Skip it when the sign must remain perfectly vertical, the floor slopes, the location is windy or the legs would intrude into a busy route.
When wall mounting makes sense
Wall mounting preserves valuable floor area and often creates a cleaner sight line. It is a strong option for directional signs, schedules and menus in narrow rooms, provided the venue has approved the location and attachment method.
Ask what is behind the finish as well as what is visible. Painted drywall, wallpaper, wood veneer, tile, masonry and fabric wall systems require different attachment strategies. A venue-approved picture rail or existing hook is usually easier to control than an improvised adhesive. Screws, nails, staples and tape may all be prohibited unless the venue grants specific approval.
Also evaluate projection into the route. Under the ADA Standards, wall-mounted objects with leading edges more than 27 inches and no more than 80 inches above the floor generally may project no more than 4 inches horizontally into a circulation path. The 2010 ADA Standards for Accessible Design provide the governing dimensions and conditions. A thick sign box, shelf-like mount or decorative frame therefore needs more attention than a slim panel attached flat to the wall.
Wall signs reward precise preproduction. Mark the installed centerline, top edge and mounting points on the plan. If several panels form one composition, make a full-size placement template. Check the final sign for readable type, contrast and viewing distance using the principles in the accessible event design guide.
When a window sign works best
Window mounting is useful at entrances because it consumes no floor space and can communicate before guests enter. It can support a directional message, event name, schedule or restrained decorative layer. The first design decision is which side must read correctly: outside looking in, inside looking out, or both.
Reflections, tinted glass, interior lighting and bright daylight can change contrast dramatically. View the location at the same time of day as the event. A pale graphic that looks elegant on a screen may disappear against a bright lobby, while a dark decal may become difficult to read from outside after sunset.
For adhesive graphics, get approval for the exact film and glass surface. Contaminants can weaken adhesion or remain visible beneath transparent material, so 3M instructs installers to clean the glass and apply the graphic promptly after cleaning. For approved decal-based details, CustomStickers offers custom vinyl stickers and related printed products that can be considered during production planning.
Do not place an event graphic where it obscures required safety information or creates confusion at doors. Establish whether the graphic will be installed on the interior or exterior face, whether it crosses a mullion and how it will be removed without leaving residue. Transport masking, alignment marks and a squeegee can make the difference between a controlled installation and a visibly wrinkled one.
When to use a freestanding sign or display
A freestanding sign is broader than an easel. It may use a weighted base, rigid post, modular frame, tensioned fabric structure or self-supporting panel. This approach suits larger branded displays, double-sided wayfinding and signs that need a more architectural presence.
Freestanding does not mean unrestricted. One university venue policy requires event items to stay clear of hallways, stairs, exits, fire equipment, sprinkler heads and permanent safety signage. Means of egress also need to remain free of obstructing furnishings, decorations and other objects, subject to local code and instructions from the venue or fire authority.
Assess the installed structure from the floor up. Bases, feet, rear braces, power leads and ballast all influence guest flow. The ADA Standards generally call for 36 inches of clear width along accessible circulation routes, with a reduction to 32 inches allowed only under limited conditions. Objects cannot reduce the required clear width. Overhead signs along circulation paths require at least 80 inches of headroom under the Access Board’s guidance. The U.S. Access Board’s sign guide also explains character, contrast and viewing-distance considerations.
Use the applicable venue, jurisdiction and project requirements when approving the final layout. Even where a temporary event sign is exempt from certain sign-content provisions, that does not remove circulation, headroom, egress or permanent-sign obligations.
Adhesives need permission and a surface test
A removable adhesive is a product category, not a promise that every finish will survive. Manufacturer instructions can specify cleaning steps, application temperatures, paint-curing periods, unsuitable substrates and a particular removal motion. Some Command products, for example, direct the user to stretch the strip slowly downward and parallel to the wall rather than pulling it outward.
Obtain permission before applying even a small sample. A test patch can show whether the chosen product bonds and releases on an approved surface, but it cannot establish that the installation complies with the venue’s rules. It also cannot correct weak paint adhesion. 3M’s guidance for pressure-sensitive graphic films calls for testing each intended film on each different substrate after cleaning and warns that weak paint-to-substrate bonding may cause damage during removal.
Test with the same product, surface preparation and dwell time planned for the event. Photograph the approved test location before application and after removal. Keep packaging and removal instructions with the setup kit so a teardown volunteer does not improvise.
Plan sight lines before approving sign size
Mounting and typography are inseparable. A low easel can hide behind seated guests. A wall sign can be lost above a doorway. A window graphic may face the wrong approach, and a freestanding panel can block the very destination it identifies.
Walk the guest route and identify the first point at which each sign must become visible. Check the approach from more than one direction, then account for queues, open doors, furniture, floral arrangements and temporary registration desks. Signs intended for quick decisions need short messages, strong contrast and enough type size for the expected viewing distance. If the sign includes a scannable action, test the final code at the installed height and distance using the QR code sign sizing and placement workflow.
Design for transport, setup and removal
A mounting method succeeds only if the crew can move and assemble it. Measure elevators, doorways and vehicle cargo openings before specifying a rigid display. Protect printed faces with sleeves or interleaving sheets, keep hardware in labeled bags and pack the correct cleaning and removal tools.
Create one installation sheet per sign family. Include a photograph or rendering, final location, finished height, hardware list, venue approval, assembly order and removal method. Add a contact for questions and a deadline for clearing the space. The broader event setup checklist can coordinate signage with printed materials, tools and final venue checks.
Final mounting checklist
- Confirm the location and mounting method with the venue in writing.
- Measure the complete installed footprint, including legs, braces, bases and weights.
- Keep entrances, door swings, accessible routes, exits, safety equipment and permanent signs clear.
- Check visibility from the actual guest approach and expected viewing distance.
- Verify that the panel, mount and hardware are compatible and stable together.
- Get permission before testing or applying adhesive to any surface.
- Test the approved adhesive and follow the manufacturer’s preparation and removal instructions.
- Pack labeled hardware, cleaning supplies, alignment tools and removal tools.
- Assign setup and teardown responsibility, with enough time inside the reservation window.
- Inspect the surface and venue area after removal.
The visual goal is simple: the sign should appear intentional, not temporarily balanced or awkwardly attached. The production goal is equally important: guests can see it, move around it and understand it while the venue remains protected. Select the mounting method only after those two goals work together in the actual room.
References
- Venue Policies | Dr. Stanley M. and Dorothy Truhlsen Campus Events Center | University of Nebraska Medical Center
- Reservation Policies | Idaho State University
- 2010 ADA Standards for Accessible Design | ADA.gov
- Application: Building Windows
- Emergency Evacuation
- Chapter 7: Signs
- Command™ 15 Lb White Bath Picture Hanging Strips | 3M United States
- # Command® Brand – Picture Hanger Instructions
- Application: General Installation Techniques